#Getting started
JustyBase runs inside VS Code. The Netezza core uses the bundled JavaScript driver; companion extensions add other database runtimes and dialects.
#1. Install the core extension
Install JustyBase SQL Editor (Netezza) from the Marketplace, or use the command line:
code --install-extension krzysztof-d.justybaselite-netezzaInstall a companion extension only for a database that needs it. The database support matrix lists the runtime and capability boundary for each dialect.
#2. Create a connection
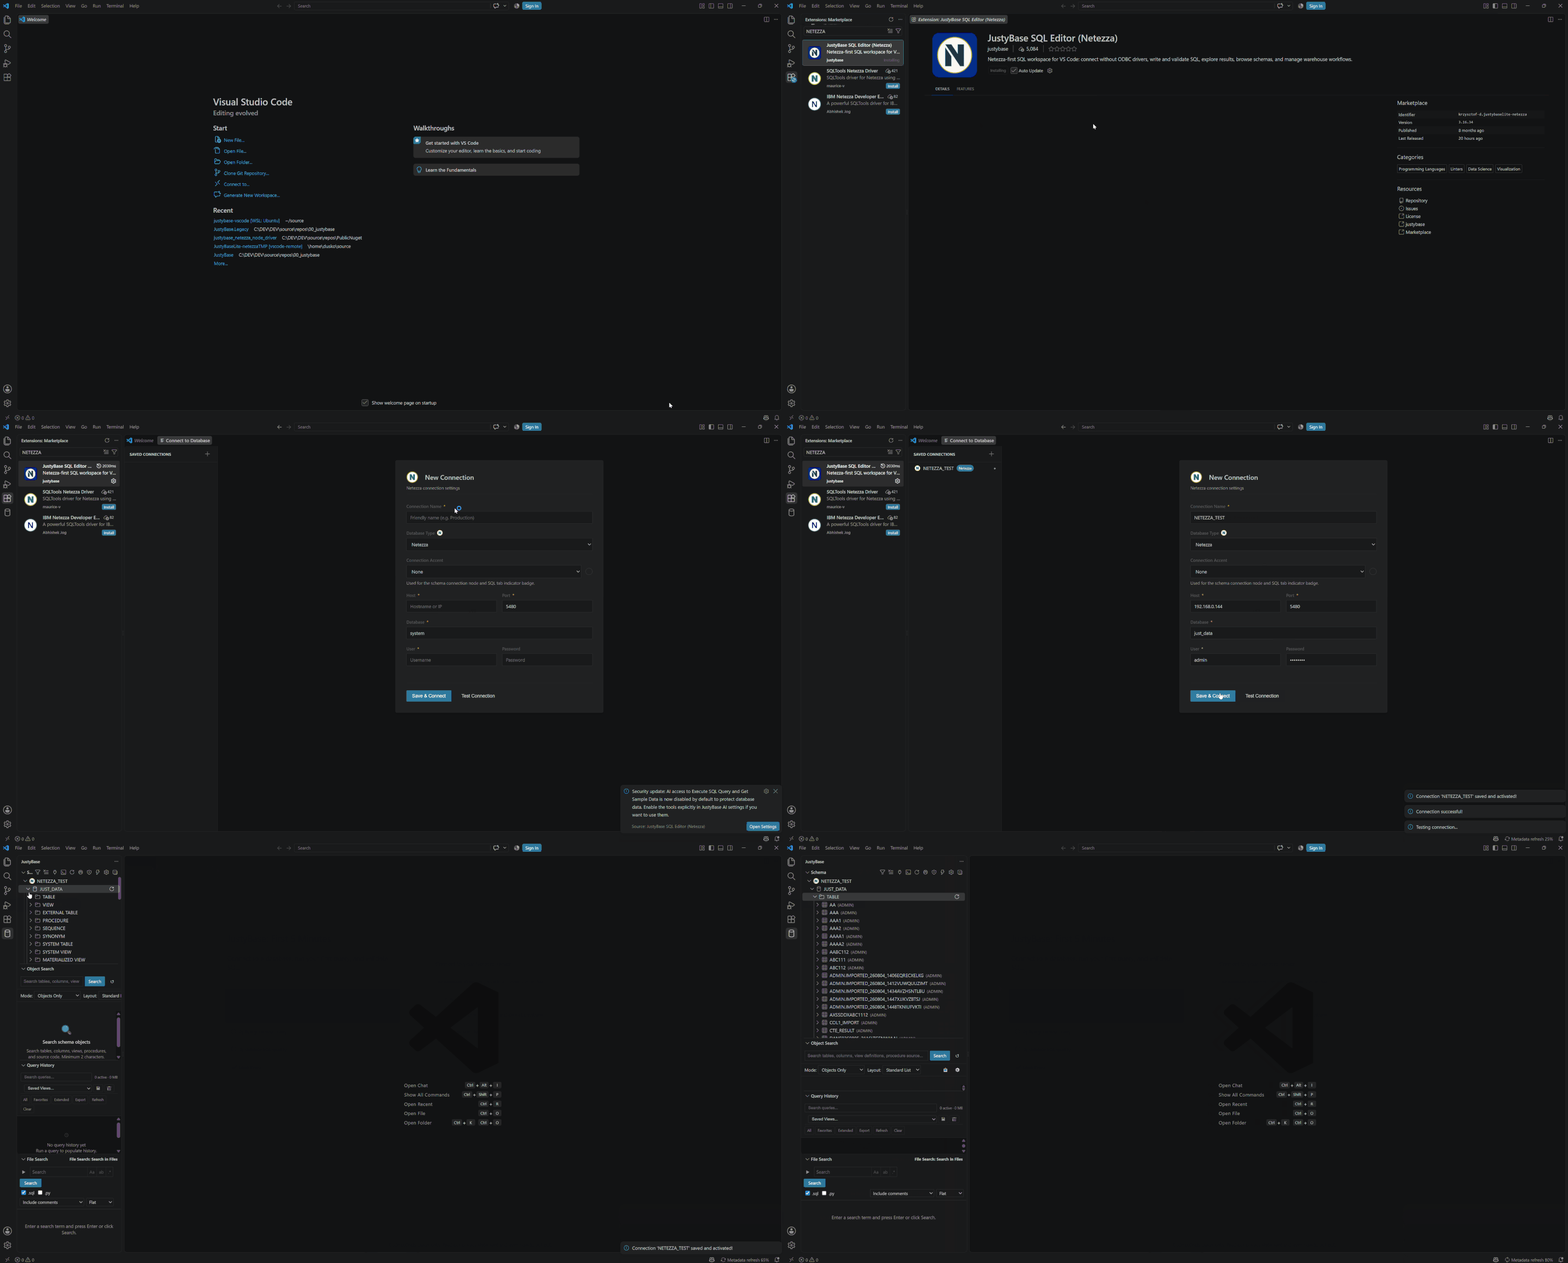
- Open the JustyBase activity-bar view.
- Select Connect… or run
JustyBase: Connect...from the Command Palette. - Choose the database kind and enter the host, port, database, user, and password.
- Test the connection before saving it.
- Save the profile with a name that makes the environment obvious, such as
NZ reporting read-only.
Passwords are stored through the VS Code Secrets API. They are not written to the workspace or to the favorites file. Keep connection profiles read-only when the workflow is exploratory.
#3. Browse the schema
Expand the connection, database, schema, and object group in Schema. Metadata loads lazily. Expand a table to fetch columns, use Refresh Selected Metadata when you know the catalog changed, or use Refresh Schema for a broader refresh. The metadata cache persists between VS Code restarts when justybase.metadataCache.diskPersistence is enabled.
#4. Open a SQL tab and run a query
Create a .sql file and try:
SELECT customer_id, order_date, total_amount
FROM ANALYTICS.SALES_ORDERS
WHERE order_date >= CURRENT_DATE - 7
ORDER BY order_date DESC
LIMIT 1000;
Use Ctrl+Enter or F5 for the current statement. Press Ctrl+Alt+Q (Cmd+Alt+Q on macOS) to cancel a query running from the active SQL editor. Use Run Query Batch for multiple statements. The result panel streams rows as they arrive, preserves separate result sets, and allows cancellation from the toolbar.
#Quick SQL typing shortcuts
In a SQL or MSSQL editor, type one of these shortcuts followed by a space to expand it:
| Type | Expands to |
|---|---|
SX |
SELECT |
FX |
FROM |
JX |
JOIN |
WX |
WHERE |
GX |
GROUP BY |
HX |
HAVING |
OX |
ORDER BY |
LX |
LIMIT |
IX |
INSERT INTO |
UX |
UPDATE |
DX |
DELETE FROM |
CX |
CREATE TABLE |
Typing LIKE followed by a space inserts a pattern with two wildcards (for example, LIKE '%%') and places the cursor between the % characters.
#5. Inspect before changing data
Diagnostics are available while you type. For writes, the safe-execute confirmation is enabled by default. Preview the generated DDL, import plan, or table edit before confirming a change. The result panel is an exploration surface; it is not a substitute for a transaction or a database backup.
#What needs a connection?
| Capability | Connection needed? | Notes |
|---|---|---|
| Lexer/parser syntax diagnostics | No | Context and dialect still affect accuracy. |
| Formatting, folding, symbols, basic completion | No | Metadata improves object and column suggestions. |
| Schema, DDL, table profiles, history from a database | Yes | The active tab or selected connection supplies scope. |
| AI schema tools and database validation | Usually | Privacy confirmation appears before supported Copilot actions. |
| File SQL and local Data Workspace | A file profile | The local runtime is DuckDB or SQLite depending on the source. |
#If the first query fails
- Confirm the tab’s connection and database; a global active connection does not silently override an explicit tab selection.
- Refresh the schema if the table was created outside JustyBase.
- Check the Output panel for driver/runtime diagnostics.
- Reduce the query with
LIMITand verify the database user can read the referenced objects. - For a timeout, inspect Performance and Reliability before increasing limits.